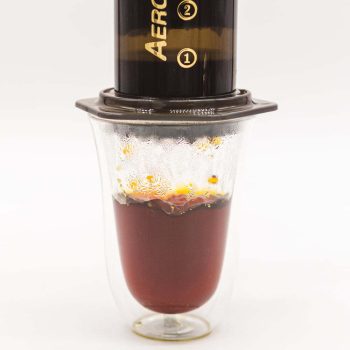
In this article we’ll cover how to find the best coffees for using in an Aeropress how to brew coffee with it for perfect taste.
This includes the required grind size. We’ll also share the must-have complimentary accessories to ensure you get the best out of your Aeropress.
What Is The Aeropress?
The Aeropress Coffee Maker is an easy way of brewing fantastic and consistent cups of coffee.
The best bit?
It requires minimal clean up.
The plastic design is virtually indestructible, making it the perfect companion for camping trips of days out.
The Aeropress was created in 2005 by Alan Adler and has become an international sensation among coffee lovers. In a similar style to the Cafetière, the Aeropress is what we call a ‘full immersion’ brew method, you have full control over extraction and brew time. Other brew methods such as the V60 and drip filter are known as percolation.
It’s considered one of the most interesting and innovative ways of brewing coffee.
Let’s start with how to identify the best coffees for an Aeropress.
Which Are The Best Coffees For Using in An Aeropress?
Depending on your preference of drinking a light or dark roast may determine which coffee you find best in the Aeropress. Below are a few of our most popular coffees for brewing this way.
Nicaragua Fairtrade Women’s Cooperative
Our Nicaragua Fairtrade Certified Coffee has notes of dark chocolate, caramel and dry-roasted peanuts. The Aeropress does wonders in bringing out these flavours while reducing the acidity of this coffee.
Papua New Guinea PNG
As a medium roast level, The Papua New Guinea (PNG) Coffee has a slight fruitiness with undertones of chocolate. This gives it a rich body when brewed with Aeropress.
Kenya Blue Mountain
When using our Kenya Blue Mountain Coffee, the Aeropress offers good clarity and a full body, it’s a great way of extracting every bit of juiciness from this Kenyan coffee.
Navio Espresso
The Navio Espresso blend is designed to be brewed through an Espresso Machine. However, when our team tried it with an Aeropress, they decided it was one of the best available. It makes for an easy- drinking, smooth brew but with a full body to go with it.
Rwanda Kinini Microlot (Light body, citrus and floral flavours)
As part of our Single Estate Range, the Rwanda Kinini beans are picked at a whopping 1,800m above sea level. Most coffees picked above 1,300m above sea level are seen as much superior quality due to the climate and conditions in which they are grown.
Decaf Mexico Coffee
A smooth, nutty coffee with a low acidity. The taste of our Decaffeinated Mexican Coffee is just as high quality as our other single origins, with no compromise on flavour due to the lack of caffeine. Perfect for those late afternoon brews.
Which Grind Size is Best For Aeropress?
If you have a grinder, we’d always recommend buying coffee beans and grinding your own so you can get the correct grind size. Simply put, this is the freshest and tastiest way of consuming your coffee.
If you don’t have a grinder and purchase ground coffee, be sure to do so in small batches to keep it as fresh as possible. Storing your coffee in an ambient location away from direct sunlight is also an important factor in its freshness.
We would recommend a medium to fine grind size for the Aeropress, visually it should look like table salt. This will ensure an even and full-bodied extraction. If your grind is too coarse this can lead to over extraction and bitterness.
How To Brew With The Aeropress: Classic And Inverted.
We’ll show you the standard way to brew and then for once you’ve mastered the basics, the Inverted method. There are also other variations such as staggered pours and cold- bloom. But we won’t go there just yet. In a recent poll by Perfect Daily Grind, the Inverted method proved to be the most popular at 78.18%.

Who knows, you could be entering the Aeropress World Championships before long.
Classic:
Step 1 – Place filter paper in cap
Place the filter paper into the cap and rinse well to remove the papery taste.
Step 2 – Position the Aeropress
Attach the filter cap to the base of the Aeropress and put it on top of your cup.
Step 3 – Grind the coffee
Grind 15g of coffee (Up to 18g if you prefer a stronger brew) and put it straight into the Aeropress.
Step 4 – Pour the water into the chamber
Pour 250ml of hot water over the coffee. Between 92 – 94° is best, wait for 2 minutes after boiling the kettle to achieve this. *If you don’t have a set of scales, fill to just above the number 4*
Step 5 – Stir to break up clumps
Stir well to break up any clumps and saturate all the grounds and put the top of the Aeropress on the body. This will create a seal that’ll stop any more water from draining into your cup.
Step 6 – Wait 2 minutes. Plunge.
Wait 2 minutes. Start to press down and stop when you hear a hiss. This will take approximately 20 seconds as there’s some pressure required to push the water through the paper.
Inverted:
This method is literally ‘upside down’, stopping the water dripping through the filter before it’s time to plunge. This results in a slightly richer flavour as more water is retained for the immersion stage of the brew.
Step 1 – Place filter paper in cap
Place the filter paper into the cap and rinse. This gets rid of the papery taste.
Step 2 – Preheat your cup
Preheat your cup with hot water. This will need to be discarded before brewing.
Step 3 – Assemble the Aeropress
Put the plunger into the body of the Aeropress and invert. The end you fix the cap onto should be facing upwards.
Step 4 – Grind the coffee
Grind between 15g – 18g of coffee on a medium setting.
Step 5 – Boil the kettle. Wait for 2 minutes.
Boil the kettle and wait for a few minutes. The ideal temperature is between 92 – 94°
Step 6 – Bloom with 30ml water
Pour 30ml of hot water and allow the coffee to bloom for 30 seconds. This is the stage where the gases trapped in the coffee start to be released, you’ll notice it start to bubble. Stir once or twice to ensure all of the grounds are wet.
Step 7 – Pour in remaining water
Pour the remaining 220ml of water into the chamber. Stir again to disperse the grounds and break up any clumps.
Step 8 – Secure the filter cap
Place the filter cap on the body and secure, invert onto a mug.
Step 9 – Plunge!
This should take approximately 20 seconds, it takes quite a bit of pressure to push the water through the filter. Stop when you hear a hissing sound.
The Best Accessories For Aeropress
We offer a range of high quality accessories for your Aeropress. From grinders to reusable filters, we have everything you need to start brewing.
Hario Skerton Mill – A well designed and high quality hand grinder. The Skerton has ceramic burrs and a glass body with a capacity of 100g, so you can grind enough coffee for multiple brews throughout the day.
Paper Filters – The same 350 filter papers that were included with your Aeropress, available separately.
Metal Filters – Is it time to consider a reusable option? Our metal filters range from £9.95 – £19.95. Available in fine or super fine mesh, they let more of the coffee oils through and produce a fuller bodied brew.

